How to Pet-Proof a Balcony for Cats
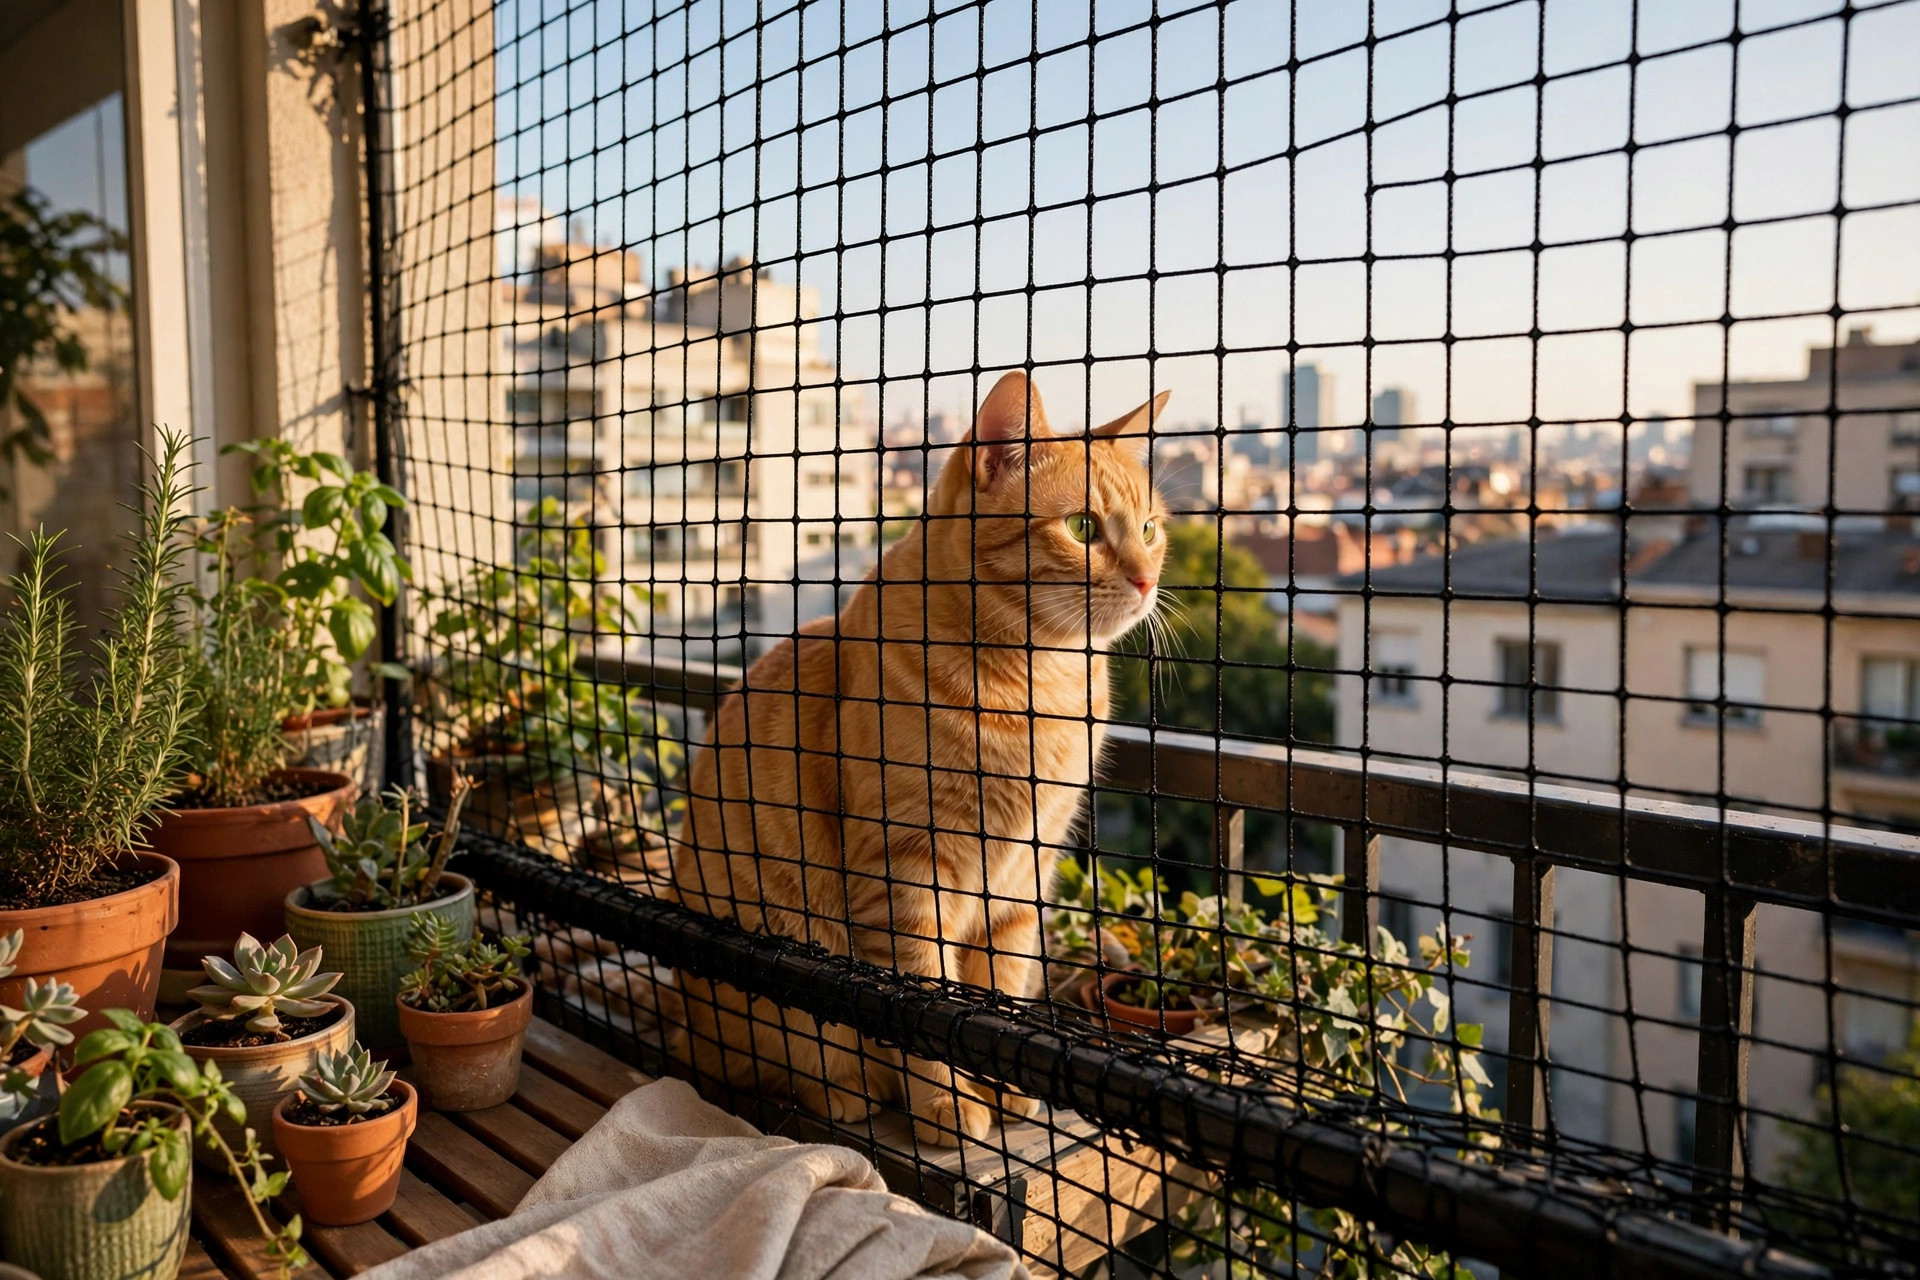
A balcony is the best room in the apartment as far as your cat is concerned — sun, air, and a live bird channel. It is also the one space where a single startled leap has consequences you cannot undo. The good news: a renter-friendly enclosure costs less than a vet visit by a factor of ten and takes one afternoon.
Start with the 10-minute risk audit (do this before buying anything)
Balcony falls are one of the most preventable emergencies in high-rise cat care, and the pattern is almost always the same: a cat that has used the balcony calmly for months suddenly chases a pigeon, a moth, or a falling leaf. It is not misbehavior — it is predatory reflex in a space that was never designed for it. Before you shop for netting or furniture, walk the balcony with a tape measure and a phone flashlight and audit five specific risks in order.
- Railing gaps. Measure the widest gap between balusters, under the bottom rail, and at the corners where the railing meets the wall. A gap over 2.5 inches is a squeeze-through risk for an average adult cat; kittens and small breeds can clear gaps under 2 inches. Photograph each gap — you will need the numbers when you choose netting or acrylic panels.
- Climbable launch points. Note anything within 3 feet of the railing that a cat can climb: chairs, storage boxes, planters, air-conditioning units. Cats do not jump from the floor to the top rail nearly as often as they climb a chair first and then step across. If it can hold a cat, treat it as part of the railing.
- Door and screen condition. Open and close the balcony door ten times. Does the latch catch every time? Is the screen mesh loose at any corner? A surprising number of escapes happen through a door that looks closed but never latched, especially in older rentals with warped frames.
- Drop and landing. Look down. A second-floor balcony over grass is a different risk profile from a twelfth-floor balcony over concrete — but do not let a low floor make you complacent. Even a one-story fall can fracture a jaw or pelvis, and a cat that survives the fall may bolt and be lost in an unfamiliar street.
- Neighbor and building rules. Check your lease and building rules for balcony enclosures before you buy. Many buildings allow clear netting or acrylic but prohibit opaque screens, and some HOAs regulate anything visible from the street. A five-minute email to building management saves a teardown later.
Write the gap measurements, the floor number, and any rule restrictions on a sticky note. Every choice in the rest of this guide — mesh size, mounting method, budget — keys off those three facts.
Enclosure options compared: netting, acrylic, and full catio frames
There is no single best balcony system — there is the system your cat, your lease, and your exposure actually require. The three families below cover nearly every apartment situation. Prices are typical U.S. street prices in 2026; measure your balcony perimeter in linear feet before comparing, because material is sold by the roll or panel.
| System | Typical cost | Renter-friendly? | Best for |
|---|---|---|---|
| Knotted polyethylene cat netting (e.g., Catnet-type rolls, 1.5–2 in mesh) | $25–$60 per 30–50 ft roll, plus hooks | Yes, with removable hooks and cable ties | Most rentals; large or irregular railings |
| Clear acrylic or polycarbonate panels | $15–$35 per 2×4 ft panel | Sometimes — clamp or zip-tie mounting only | Wraparound views, wind-prone high floors, gaps under rails |
| Framed catio enclosure (wood or aluminum frame + wire mesh) | $250–$900+ depending on size | Rarely — usually needs landlord approval | Long-term homes, multi-cat households, ground-floor patios |
Netting is the default for renters because it is light, cheap, and reversible. Choose knotted (not welded or extruded) polyethylene with a mesh opening no larger than 2 inches — 1.5 inches is safer for kittens. Dark green or black netting disappears visually against most railings and is less likely to draw an HOA complaint than white. Avoid decorative garden netting sold for birds; it stretches, tangles claws, and is not rated for a lunging cat.
Acrylic panels solve a different problem: the gap under the bottom rail and the space between widely spaced balusters on modern buildings. Panels also block wind, which matters on exposed high floors where netting billows. The tradeoff is cleaning — acrylic shows paw prints and rain spots and needs a non-abrasive cleaner — and heat: a fully paneled south-facing balcony can overheat in summer, so leave ventilation gaps at the top if you panel more than the lower half.
A framed catio is the most secure option and the only one that lets you leave the balcony door open unattended with real confidence, because it encloses the top as well as the sides. If your cat is a committed climber or your building is above the sixth floor, the frame is worth pricing even as a renter — some landlords approve a freestanding frame that touches no building structure. Expect to spend a weekend assembling it and to anchor it against wind loads.
- Kitten or cat under 6 lbs: mesh ≤ 1.5 inches, no gap over 1.75 inches anywhere.
- Average adult (8–12 lbs): mesh ≤ 2 inches, no gap over 2.5 inches.
- Large or strong breed (Maine Coon, Bengal): prioritize tension and mounting strength over mesh size — these cats defeat loose netting by weight, not by squeezing.
No-drill installation, step by step (60–90 minutes for a typical balcony)
This sequence assumes black polyethylene netting on a metal or wood railing — the most common rental setup. Total time is 60 to 90 minutes for a 10×4-foot balcony, longer if your railing has corners or a return wall. You will need the netting roll, removable adhesive hooks or clamp hooks rated for outdoor use, UV-resistant cable ties (8-inch), scissors, and a step stool. Work on a calm day; wind turns a large net into a sail.
- Clean the mounting points (10 minutes). Wipe each spot where a hook will sit with rubbing alcohol and let it dry fully. Adhesive hooks fail on dusty or damp railings, and a hook that fails in week three is worse than no hook, because it fails under load without warning.
- Set the top line first. Run the netting along the top rail and fix it every 12–18 inches with cable ties or hooks. Pull it hand-tight — snug, not guitar-string tight. Over-tensioned netting transfers a lunging cat's full force to the weakest hook; slight give absorbs impact.
- Work down the sides. Fix the vertical edges to the end posts or walls next, then the bottom edge. At the bottom, leave no gap larger than your audit limit. On many balconies the bottom is the hardest line because the floor slopes for drainage; use an extra row of cable ties through the lowest mesh diamonds rather than trying to stretch the net flat.
- Seal corners and odd gaps. Corners where the railing meets the building are the classic escape slot. Fold the netting into the corner and tie it at three heights. If a structural gap remains — for example between a planter box and the rail — block it with a small acrylic offcut or a second layer of netting rather than leaving a cat-sized triangle.
- The push test. Push firmly outward at the center of each span with the flat of your hand, roughly the force of a cat hitting the net at a run. The net should deflect a few inches and spring back, with no hook popping and no gap opening at any edge. Test the bottom corners hardest; that is where real cats test too.
- Trim and melt the ends. Cut excess netting leaving a 1-inch tail, and briefly pass a lighter along cut ends to stop fraying. Tuck tails inward so no loose filament invites chewing.
If your lease prohibits even adhesive hooks, use railing clamp hooks that tighten with a wing nut — they leave no mark and hold as well as screws for netting loads. Photograph the finished installation before your cat's first session; if anything loosens later, the photo is your reference for what changed. For strap and tie-down ideas that also help with shelves, see our guide to renter-friendly wall-mounted cat shelves, which uses the same no-drill mounting logic indoors.
Furniture, plants, and the habits that make the system actually work
Hardware fails less often than routines do. These furniture and habit rules are what turn an enclosed balcony from a photo opportunity into a daily-safe space.
Keep a 3-foot no-climb buffer. Move chairs, side tables, and storage boxes at least 3 feet from the railing, or accept that your cat will be at railing height and make sure the enclosure extends above that point. A low lounge chair pushed against the rail quietly converts a 42-inch railing into a 20-inch step. If space forces furniture near the rail — common on 5×3-foot balconies — choose low, heavy pieces without a climbable back, and never place a cat tree on the balcony at all.
Audit plants before the cat goes out. Lilies, oleander, sago palm, and many common patio herbs are toxic to cats, and balcony planters sit exactly at chewing height. Move anything toxic indoors or up out of reach, and offer a dedicated pot of cat grass on the balcony floor instead — it gives the chewing instinct a safe target. Our broader guidance on greenery indoors applies on the balcony too; if you are choosing new plants, start from a pet-safe list rather than detoxing later.
Supervise the first two weeks, even with netting. Watch how your individual cat uses the space. Some cats ignore the net entirely; others methodically test every corner in the first 48 hours — which is exactly when you want to be watching. Note any spot that gets repeated attention and reinforce it before it becomes a project. After two calm weeks, brief unsupervised time is reasonable for most enclosed balconies, but never leave a cat out overnight or during fireworks, storms, or building maintenance on the facade.
Heat and weather cutoffs. A sunny balcony can exceed 100°F (38°C) on the floor slab even when the air feels pleasant. Provide a shaded zone and fresh water on any session over 20 minutes, and bring the cat in if the railing or floor is hot to the back of your hand. In winter, check that netting has not iced stiff — frozen netting holds shape but its hooks carry extra load, and a cat slipping on an icy floor near the rail is a fall risk even with an enclosure.
The most common balcony incident is not a cat defeating good netting — it is a cat on a balcony that was 'almost finished.' Do not let your cat out 'just for a minute' during installation. Finish, push-test, then open the door.
Maintenance schedule and when to upgrade your setup
Balcony proofing is not install-and-forget. UV, wind, and a determined cat degrade every component on a predictable schedule. A five-minute monthly check catches nearly all of it.
- Monthly (5 minutes): Walk the perimeter. Tug each hook and a sample of cable ties. Look for chewed mesh, sun-bleached brittle sections (polyethylene turns chalky and stiff), and any new gap where furniture has shifted. Replace individual cable ties freely — they are the cheapest insurance in the system, roughly $8–$12 for a pack of 100 UV-resistant ties.
- Every 6 months: Re-tension the top line, wash acrylic panels if fitted, and re-run the push test. This is also the moment to re-check door latches and screen corners, which loosen with seasonal temperature swings.
- Replace netting every 2–3 years in sunny climates, sooner if you see whitening, cracking, or a tear longer than half an inch. A full re-net of a typical balcony costs $30–$60 in materials — trivial against a single emergency vet visit, which commonly runs $800–$3,000 for fall injuries.
Upgrade triggers. Move from netting to panels or a frame if any of these occur: your cat learns to climb the net itself (some do, usually young, athletic cats); a hook fails twice in the same spot; you move above the sixth floor; or a second, stronger cat joins the household. Bengals, Savannahs, and large Maine Coons in particular justify a framed enclosure from the start — budget $300–$600 for a modest framed build and treat netting as a temporary measure only.
Finally, keep perspective on cost. A complete renter-friendly netting setup for a standard balcony — netting, clamps, ties, and a pot of cat grass — typically lands between $45 and $90 total. It is one of the cheapest safety upgrades in apartment cat care, and unlike most pet purchases, it only has to work once to have been worth it. Pair it with a secure window setup indoors (see best window perches for apartment cats) and your cat gets the views and air it wants without either space becoming the weak link.
FAQ
Can a cat fall from a balcony even if it has never shown interest in the railing?
Yes — that is the typical story. Falls usually follow a sudden chase reflex toward a bird or insect, not habitual railing-walking. A cat that has been calm for a year has not been tested by the right distraction yet, which is why enclosure matters more than temperament.
What mesh size is safe for a kitten?
Use 1.5-inch mesh or smaller, and keep every structural gap under 1.75 inches. Kittens compress through openings that look impossibly small, and they climb higher relative to their size than adults. Re-check gaps monthly — kittens grow, but their boldness grows faster.
Will my landlord allow balcony netting?
Most allow removable, non-structural netting, especially in black or dark green, but rules vary. Send a short written request describing the no-drill mounting before you install. If netting is refused, ask specifically about clamp-mounted acrylic panels — they are often approved as a wind screen.
Is netting alone enough on a high floor?
For most cats, properly tensioned knotted netting with sealed corners is sufficient. Above roughly the sixth floor, or with strong climbing breeds, a framed enclosure that also covers the top is the more defensible choice, because the consequence of any single failure is so much higher.